ED Tech Collection

Category: Free Inquiry

This is the category to apply to your Free Inquiry posts.

Procreate/Sketchbook Tutorial

Disclaimer… For this tutorial I used a free version of an iPad app called Sketchbook as it has many of the same functions as procreate without the cost.

The Tutorial also aligned with the functions of the app.

https://www.sketchbook.com

For my final free inquiry tutorial I wanted to try something a little bit more creative. I have often found that when you have an idea in your head of a specific graphic or image it can be easier just to draw instead of trying to create it digitally.

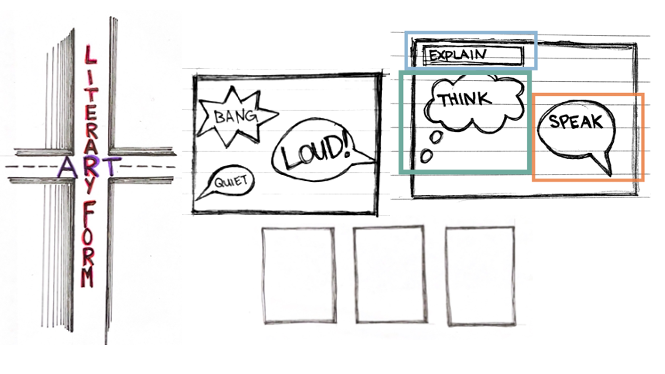
Here are some examples that I drew and then had to scan for a intro to comics lesson.

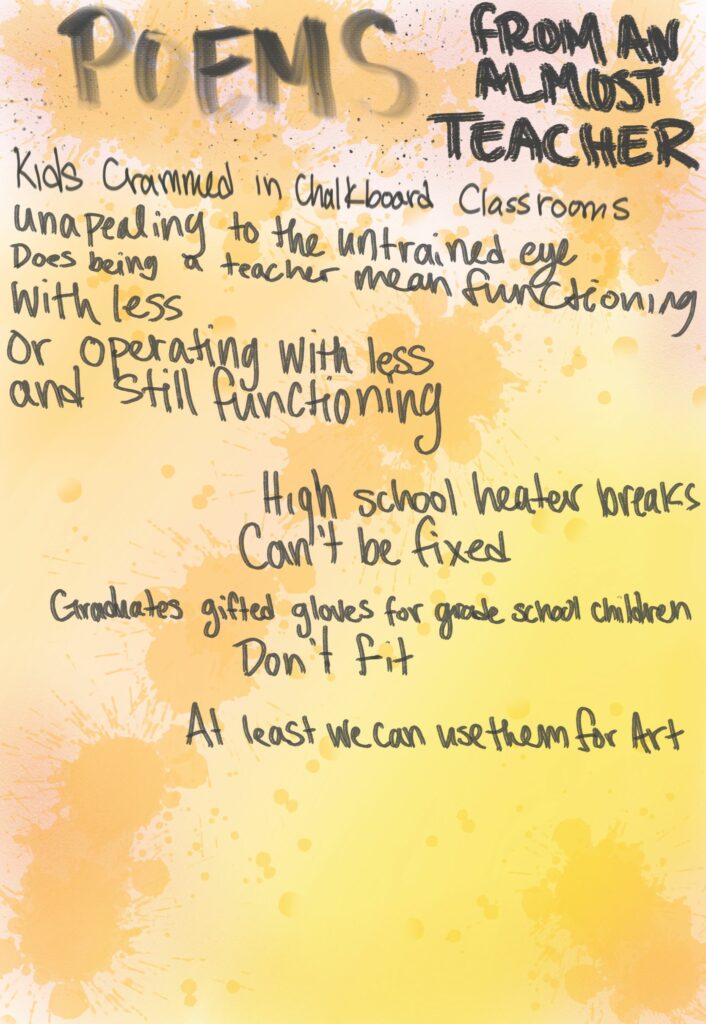
This is a Multilayered Art/Text project that I created for this tutorial. I have also included a clip that highlights how you can use tools within the app to create graphic and other works. The clip was uploaded to YouTube so it can be watched at 2x speed if desired.

I will probably use this again in the future as once I was familiar with the tool it was much more convenient than creating something on paper and trying to scan it to use digitally.

EdTech Tutorial: Using Google Forms for data collection, student info, anonymous feedback, and quizzes

This tutorial was particularly useful as in doing the tutorial, I was able to create a reflective self assessment tool for my link to practice observation and seminar.

Here is a screen recording of me going through the form I created, illustrating how teachers can use forms to collect student responses, or as a tool for personal data collection and self reflection. The video also shows how the responses to the form can be viewed as as summary of all questions, as individual responses, or anonymously by question.

One useful tool that I did not know about before completing the tutorial was how forms can format responses into visuals that you can copy and share.

These visuals are great for presenting data for personal use and could be extremely valuable in the classroom to visually represent the learning strengths and potential weaknesses of the class.

Lastly, the video illustrates how information from the form can be reformatted into a presentation that may be easier to share.

Audio and Video Editing: Video Editing With Microsoft ClipChamp

For my first tutorial I choose to undertake learning about video editing. Because I am not proficient with video editing I thought it would be good to start with the basics. As such, I decided to do the tutorial that focused on video editing using iMovie and ClipChamp. I chose to use ClipChamp as it can be accessed online through Microsoft 365 and it can therefore be accessed and edited on any device.  I found the tutorial relatively easy to follow despite the fact that it was slightly outdated as ClipChamp has replaced Microsoft video editor. As a result, there were certain sections of the tutorial that I had to improvise in order to achieve my intended result.

As evidence of my learning, I created a brief video introducing my pets. I used my recently acquired knowledge of transitions, music inclusion, captioning, clip cropping and clip speed adjustment to create the video. 

Here it is…

© 2025 LLTech

Theme by Anders NorenUp ↑